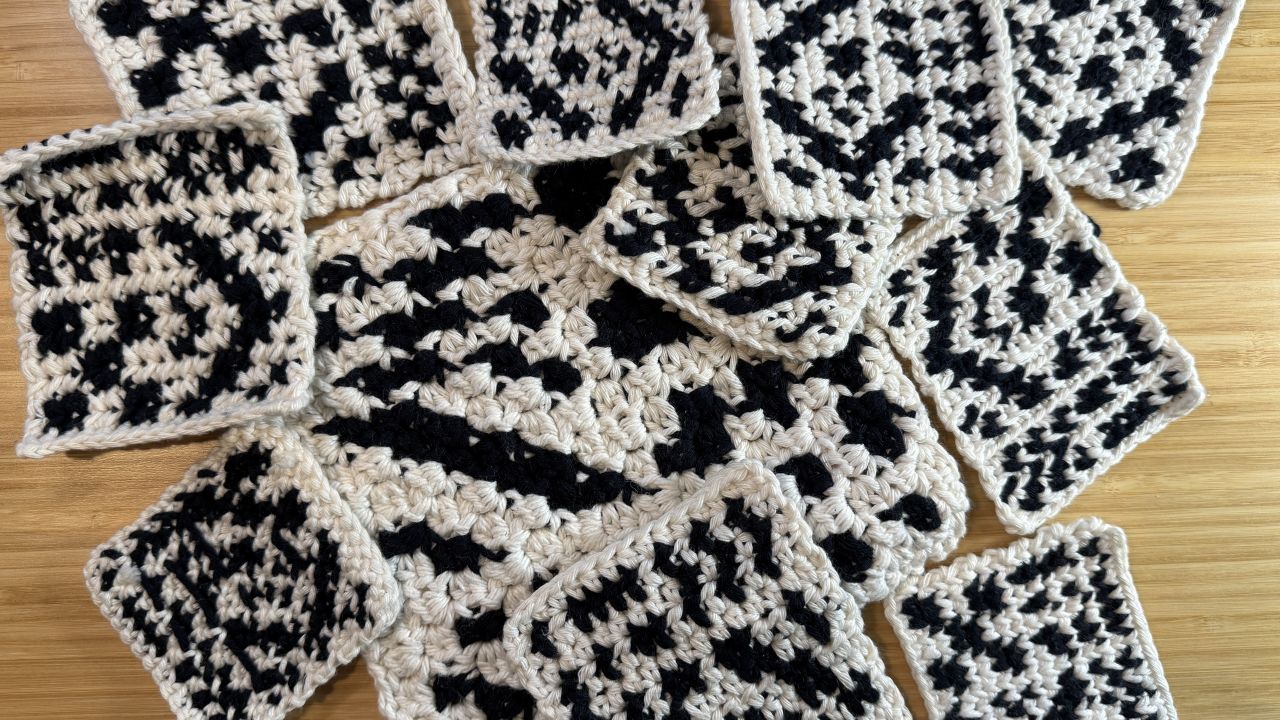
I love a crochet tapestry. I think they’re so fun, and the shapes that single crochets create on the grid can add some fun texture to that base grid. HOWEVER, it does annoy me just a little bit that when using single crochets the stitches don’t quite line up in a perfect grid- if you do a 1×1 checkerboard, it’ll end up looking more like weird vertical lines. So I spent way too long with way too many stitches trying to figure out how to make the stitches line up in a grid, and this is the result!
Overview
I’ve crocheted the grid below using 11 different crochet stitches to see how it works up with each of them.

The main section I’m looking at for clarity of the grid is that 1×1 checkerboard in the upper right. Using a single crochet (as is standard for tapestries) doesn’t allow this checkerboard to come in clearly, so I wanted to see which stitches, if any, would allow it to do so.
Each stitch has a rating based on how difficult the stitch is to do, a little on my thoughts on the stitch, and then a list of pros and cons for each stitch.
Table of Contents
Failure Stitches (yoss, hdc, blo/flo sc)
Single Crochet (and variations)
- Single Crochet (yarn over)
- Single Crochet (yarn over, mirrored)
- Single Crochet (yarn under)
- Single Crochet (yarn under, mirrored)
- Single Crochet Grid Comparison
Failure Stitches
These stitches don’t really work, but it’s still fun to see what they look like!
Yarn Over Slip Stitch
Difficulty: 3/5. Working through the yarn over is difficult.

Yarn over slip stitch is a pain to work, but it does create these funky horizontal ridges in the tapestry, which are pretty fun.
You do lose quite a bit of clarity with this stitch. A lot of the pixels turn into small color blobs, which isn’t what I’m looking for here.
Pros:
- The ridges are kinda fun I guess
Cons:
- It’s really difficult to work through the yarn over
- The image is not clear
BLO/FLO single crochet
Difficulty: 2/5

I really expected this one to keep clarity between the rows! And it kind of does! But mostly it gets a little bit too vertically stretched, and doesn’t quite work.
Pros:
- Easy to do
Cons:
- Not square 🙁
Half Double Crochet
Difficulty: 1/5

Half double crochet is actually used in some tapestry clothing since it has a bit more flow than single crochet. The thing is, it’s still not square, so when testing this stitch based on a square grid, it kinda fails. It does still look nice, so if your pattern is designed for hdc stitches it should work out fine!
Pros:
- Extremely easy to do
- Works well for garments!
Cons:
- Taller than square
Single Crochet (and variations)
I’ve made 4 different tests using a single crochet stitch. Traditional single crochets are worked using yarn overs, but I’ve tested this using a yarn under single crochet, as well as mirrored single crochets (more on that later!)
Single Crochet (yarn over)
Difficulty: 1/5
This is the traditional single crochet, and the stitch used in most crochet tapestries.

The major thing I notice with this stitch is the fact that stitches aren’t perfectly aligned with the grid. This is most obvious in the 1×1 checkerboard in the upper right, but is also notable in the rightward chevron. The lower portion of the chevron is fairly smooth, but the upper portion is more jagged.
Pros:
- Traditional tapestry stitch- patterns are designed for this stitch
- Intuitive
- Stitch is mostly square
Cons:
- Not aligned- staggered checkerboard
Single Crochet (yarn over, mirrored)
Difficulty: 3/5 if unfamiliar with mirroring, 2/5 with practice
Mirror crochet is what I call it when I work from the back of my work on wrong side rows in order to put the fronts of my stitches all on the same side. It’s essentially working wrong side rows using your non-dominant hand, but it can be done without changing the hand you hold your hook in. You can also think of it like how when you knit in rows, you purl the wrong side rows to keep the v’s of the stitches on the right side of your work. I have a tutorial on this stitch in particular in both left handed and right handed formats.

This stitch gets rid of the “bars” that exist on the back of single crochets, making the front of the tapestry exclusively the “v’s” of a single crochet.
Pros:
- Slightly cleaner than normal single crochet
Cons:
- Mirror stitches are difficult if you’re not used to them
- Almost not worth the extra effort to mirror, since it looks similar to normal single crochet
Single crochet (yarn under)
Difficulty: 1/5

This is a yarn under single crochet- instead of yarning over, you do a yarn under or hook over to grab your yarn. This creates a tighter fabric, and I’ve seen it most often used in amigurumi. It’s also known as an x single crochet since the front v of the stitch crosses over itself, making an x.
Pros:
- I feel that this lines up slightly better than a normal single crochet
Cons:
- Barely more difficult than normal single crochet, just due to muscle memory
- 1×1 checkerboard is still misaligned
Single crochet (yarn under, mirrored)
Difficulty: 3/5 if unfamiliar with mirroring, 2/5 with practice

For this tapestry I mirrored every other row of my yarn under single crochets to get the fronts of the stitches all on the same side.
Pros:
- Most of the pattern is clear
Cons:
- The 1×1 checkerboard seemed to somehow get worse?
Single Crochet Grid Comparison
Since these four are all just variations on a single crochet stitch, they do look pretty similar to each other. I’ve laid them out in a grid below so you can compare yarn over and yarn under stitches, as well as normal or mirrored stitches.

Center Single Crochet
Difficulty: 3/5
This is kind of a modified waistcoat stitch- if you look up a waistcoat stitch tutorial it’ll likely tell you to work your stitches between each single crochet, but we want to go through the middle of each single crochet so they’re centered on each other. Waistcoat stitch makes more of a brick-like pattern, which could still be used for tapestries (if you’ve ever made non-alpha patterned friendship bracelets, those are often made in a similar pattern), but I’m focused on stitches that lie on a grid.

This stitch is very tight. Crochet is stiff as is, but center single crochet is even more so. I wouldn’t use this for anything you’re going to be wearing.
This stitch is also slightly shorter than square. You may be able to work your stitches a little taller to mitigate this, but it’s still something to note.
Using this stitch does keep everything on a grid, which is great news though! And that 1×1 checkerboard looks great!
Pros:
- Can be worked without mirroring
- Extremely tight- no gapping
- Everything lines up really well
Cons:
- Because this is so tight, it’s really hard to work into
- Need to be really mindful to insert hook into stitches correctly
- Shorter than square
Single Crochet Decrease
Difficulty: 4/5 if unfamiliar with mirroring, 3/5 with practice
This stitch makes a tapestry follow a grid pretty well! If you look at the upper right checkerboard, you can see that the black and white pixels align in that checkerboard pattern.

Stitches here are worked into the previous and last stitch, exactly the same way I’d do with pixel stitch.
It’s also pretty clear that color changes with this stitch aren’t nearly as clean as some other stitches. You can see white peeking through in a lot of the places that are supposed to be fully black.
I did make this one using a normal color changing method (pulling the last loop up using the new color), so there may be a different method that mitigates these color gaps.
This is also a stitch that has to be mirrored in order to work! If you don’t mirror your decreases it won’t come out right.
I do really like the texture this stitch creates- I think it’s fun while still keeping the grid!
Pros:
- 1×1 checkerboard lines up!
- Fun texture
Cons:
- Lots of peek through of other colors
- Must be mirrored
Pixel Stitch
Difficulty: 5/5

This stitch is by far the best at making a tapestry look like pixel art, but it’s also one of the hardest to use. I have a tutorial on this stitch in both left handed and right handed formats if you want to learn how to crochet it.
The 1×1 checkerboard is essentially PERFECT. There are quite a few points where one color peeks through the other, but they’re pretty minimal when looking at the tapestry at large.
The only downside, and it’s a very minimal one, is that this stitch is just barely taller than square. You can see that this tapestry, while based on a square grid, sits slightly rectangular, and it’s pretty stiff so you probably won’t be able to block it out to square.
Pros:
- Stitch creates near perfect pixels
- 1×1 checkerboard has perfect alignment
Cons:
- By far the hardest stitch to learn, partially due to mirroring
- Color peeks through
- Barely taller than square
Corner to Corner (hdc’s)
Difficulty: 2/5 if unfamiliar with graphghans, 1/5 with familiarity
I’m not super familiar with corner to corner (or c2c) crochet, but people often use it for graphghans. I decided to use hdc’s rather than dc’s to keep the pixels as small as I could, but even then it’s about four times bigger than any of my other swatches.

Since this is truly my first time making a c2c graph, my color changes are definitely not ideal. The chevron in the bottom right is the most glaring example of this, with the lower leg being really spotty. Other than that, the pixels tend to be pretty clear, and someone who’s well acquainted with c2c would likely have a clearer end product.
Pros:
- Very common crochet technique, and relatively easy to learn
- Creates clean squares!
- Works well for smaller designs, especially if you want to blow them up larger
Cons:
- Larger, takes up more yarn- this is roughly 4x the size of my other samples
- Color peeks through. this could be due to my unfamiliarity with c2c crochet though, and not color changing properly.
Final notes
The stitches that create the best checkerboard and are the most accurate to the original grid are single crochet decreases, pixel stitch, and c2c crochet. When we look at just sc dec and pixel stitch, both of these are worked through two stitches, which is likely what centers these stitches on their grid, so it seems like if you want a stitch that completely follows a grid, you’ll want to work through two stitches at a time.
Most people (myself included!) are still going to want to stick with single crochets for tapestries since they’re by far the easiest stitch to work with, but I do think it’s fun to take a look at what other stitches or combinations are out there and what they look like in a tapestry setting.
I’ve also tried combining stitches in the same tapestry! The ducks below use pixel stitch for the black outlines, single crochet for the background, and single crochet decreases for all infill. The texture difference is definitely interesting, but the stitch height differences make it so the tapestry isn’t square, even after blocking.

These are also just a small selection of the stitches that might be useful for this. You could also make a tapestry not based on a grid at all, and use something like Suzette, lemon peel, or any other stitch combination to get some different texture behind your color work. That’s definitely a project for another time, but it WILL now haunt me until I try it.