In this post, we’ll cover how to do the double crochet stitch. If you’re right-handed, check that tutorial out here, or if you prefer a video tutorial check that out here.
Before we get started, make sure you have a chain of about 15 or so, which you can learn how to do here.
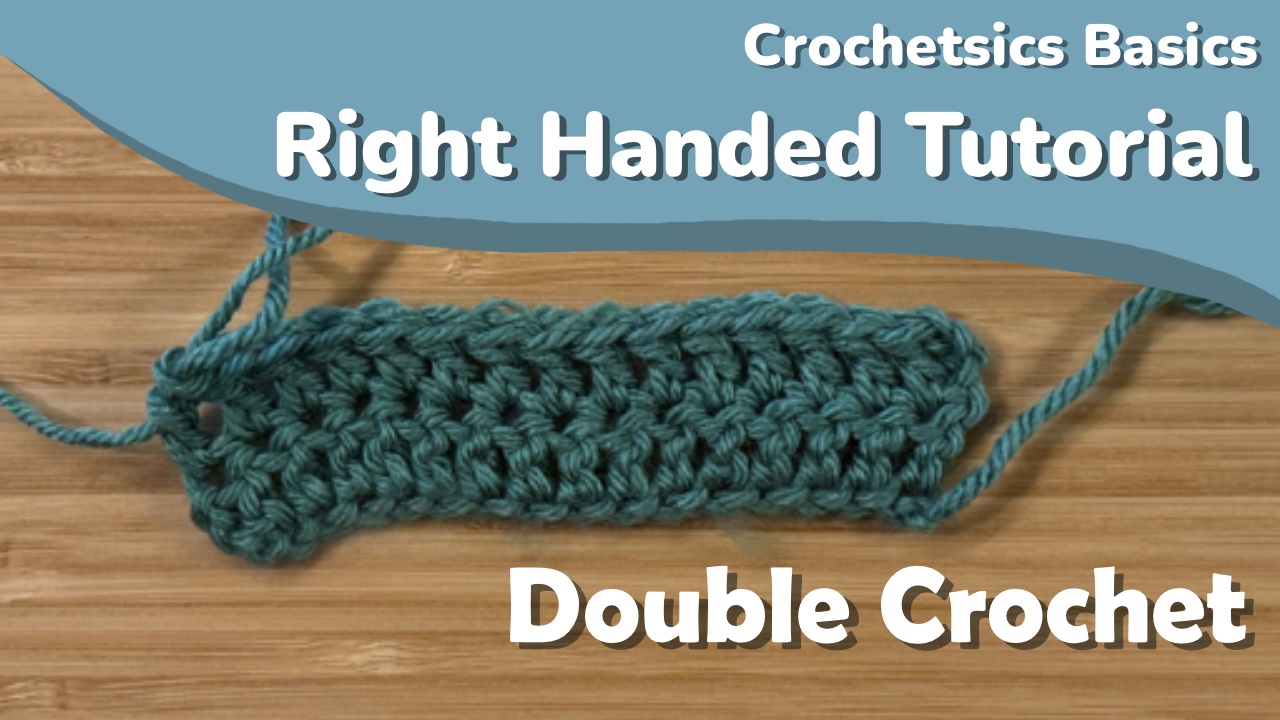
Here’s what the double crochet looks like:
Stitch instructions
The shorthand for double crochets in a written pattern is dc.
The chart symbol for double crochets is
Start by identifying the fourth chain from your hook which is indicated in the image below. This is one chain further than half double crochet since double crochet is taller.
Double crochet starts the same way as half double crochet, with a yarn over before inserting your hook into the starting chain.
Once you’ve yarned over, you’re going to want to insert your hook into the fourth chain from your hook that we identified earlier
We’ll then yarn over and pull that loop through the chain.
You now have three loops on your hook.
Yarn over again, and pull that loop through just two loops on your hook.
You should have two loops left on your hook after this.
You’ll now yarn over again, and pull that loop through both loops on your hook.
You’ve completed a double crochet!
Continue working one double crochet in every chain until you get to the end of the chain.
Continuing in rows
Continuing rows in double crochet works in the same way as half double and single crochet, but we’ll chain 3 for our turning chain.
Now you can work double crochets in the top of every stitch from the previous row. If you’re having trouble identifying the first stitch to work into, it’s marked in the image below:
Tips/common issues
Some issues you may come across while trying to make this stitch are:
Trouble inserting your hook into the stitch after yarning over- If you had issues with this in half double crochet, you probably still have that here. If you look at the gif, you can see that I use the index finger of my right hand to hold that loop as I put my hook into the chain.
Having trouble pulling through only two loops- If you’ve been able to do single and half double crochet without major issues, then this is just one of practice. You might be holding your tension too tight or too loose. I also tend to use my index finger on some loops on my hook to help control how far my hook moves or what loops move, so that may help you. You can see that in the gif above or in the video tutorial (here).
The next stitch is one that doesn’t come up all too often in my experience, but is still important- the treble crochet. I’ll see you there when you’re ready!
In this post, we’ll cover how to do the double crochet stitch. If you’re left-handed, check that tutorial out here, or if you prefer a video tutorial check that out here.
Before we get started, make sure you have a chain of about 15 or so, which you can learn how to do here.
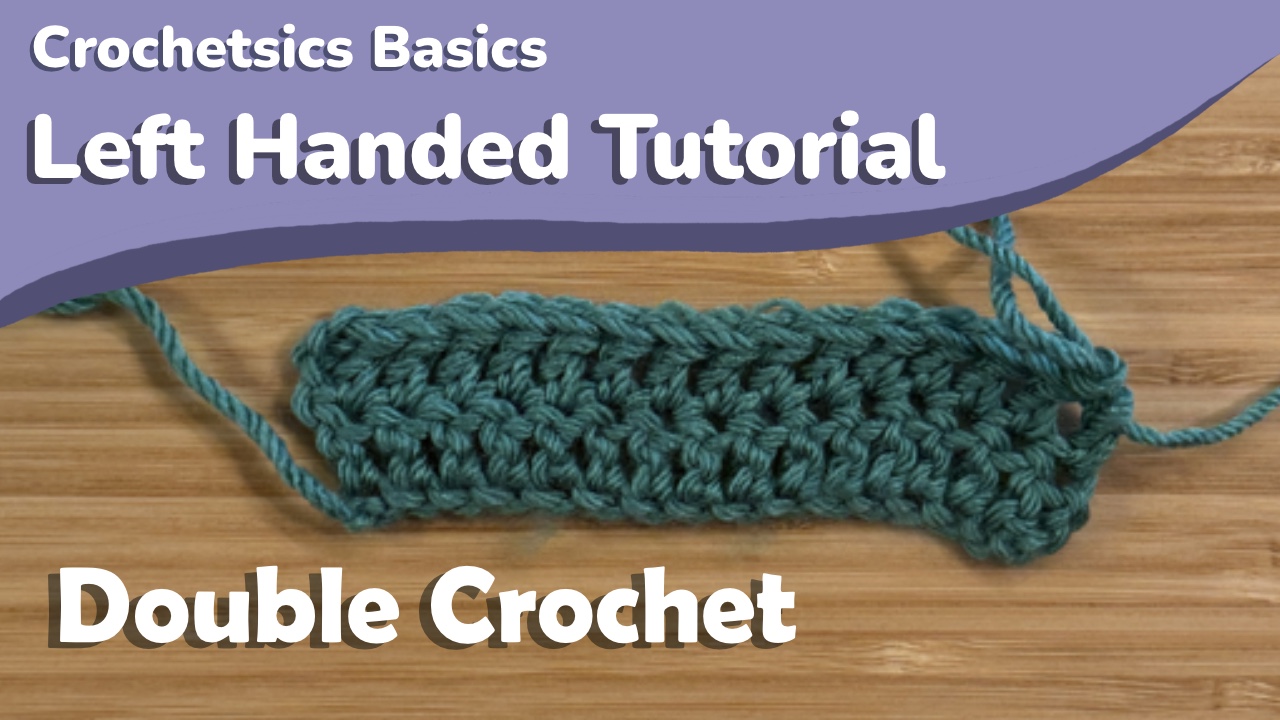
Here’s what the double crochet looks like:
Stitch instructions
The shorthand for double crochets in a written pattern is dc.
The chart symbol for double crochets is
Start by identifying the fourth chain from your hook which is indicated in the image below. This is one chain further than half double crochet since double crochet is taller.
Double crochet starts the same way as half double crochet, with a yarn over before inserting your hook into the starting chain.
Once you’ve yarned over, you’re going to want to insert your hook into the fourth chain from your hook that we identified earlier
We’ll then yarn over and pull that loop through the chain.
You now have three loops on your hook.
Yarn over again, and pull that loop through just two loops on your hook.
You should have two loops left on your hook after this.
You’ll now yarn over again, and pull that loop through both loops on your hook.
You’ve completed a double crochet!
Continue working one double crochet in every chain until you get to the end of the chain.
Continuing in rows
Continuing rows in double crochet works in the same way as half double and single crochet, but we’ll chain 3 for our turning chain.
Now you can work double crochets in the top of every stitch from the previous row. If you’re having trouble identifying the first stitch to work into, it’s marked in the image below:
Tips/common issues
Some issues you may come across while trying to make this stitch are:
Trouble inserting your hook into the stitch after yarning over- If you had issues with this in half double crochet, you probably still have that here. If you look at the gif, you can see that I use the index finger of my right hand to hold that loop as I put my hook into the chain.
Having trouble pulling through only two loops- If you’ve been able to do single and half double crochet without major issues, then this is just one of practice. You might be holding your tension too tight or too loose. I also tend to use my index finger on some loops on my hook to help control how far my hook moves or what loops move, so that may help you. You can see that in the gif above or in the video tutorial (here).
The next stitch is one that doesn’t come up all too often in my experience, but is still important- the treble crochet. I’ll see you there when you’re ready!
In this post, we’ll cover how to do the half double crochet stitch. If you’re right-handed, check that tutorial out here, or if you prefer a video tutorial check that out here.
Before we get started, make sure you have a chain of about 15 or so, which you can learn how to do here.
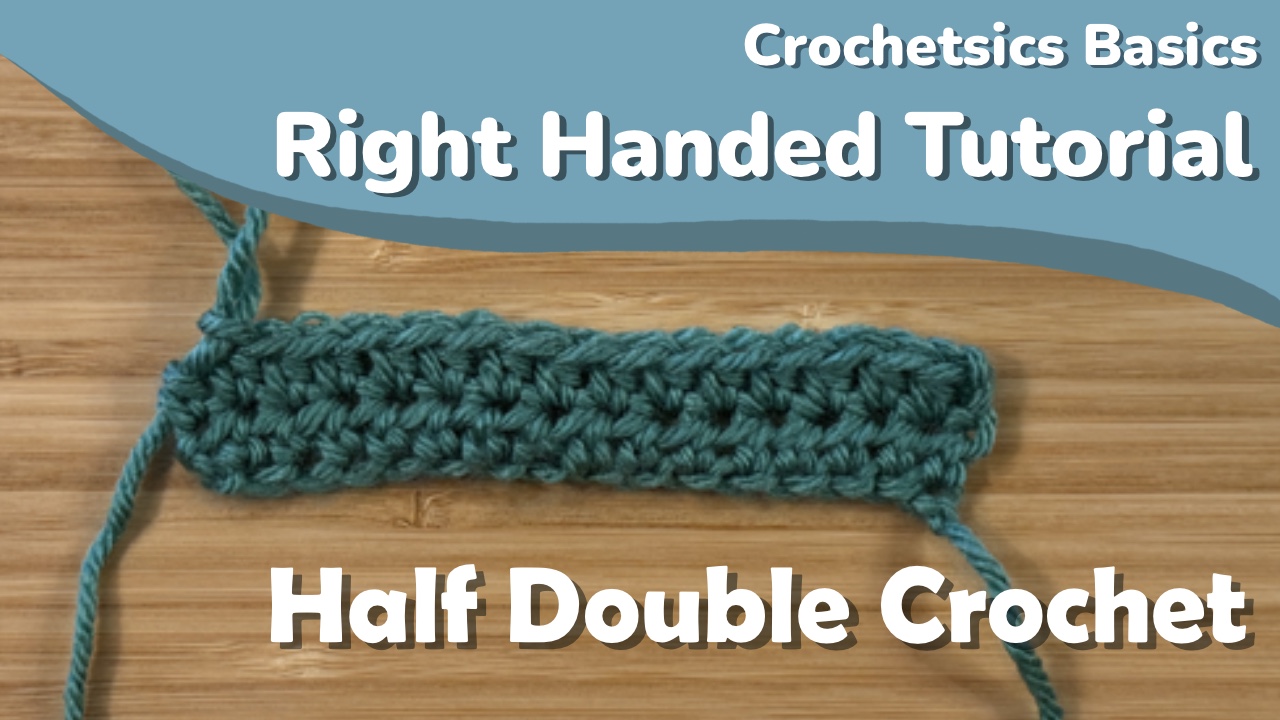
Here’s what the half double crochet looks like:
Stitch instructions
The shorthand for half double crochets in a written pattern is hdc.
The chart symbol for half double crochets is
I’m going to be working into a chain for my example.
Start by identifying the third chain from your hook which is indicated in the image below. This is one chain further than single crochet, and where we’re going to work into for this stitch.
Half double crochet starts with a yarn over before inserting your hook into the starting chain.
Once you’ve yarned over, you’re going to want to insert your hook into that third chain from your hook we identified earlier. You can put a finger from your hook hand on that yarn over to make it a little easier to insert your hook.
We’ll then yarn over and pull that loop through the chain
You now have three loops on your hook.
Yarn over one more time, and pull that through all three loops on your hook.
That’s the half double crochet!
Continue working one half double crochet in every chain.
Continuing in rows
Continuing rows in half double crochet works very similarly to single crochet. Once you get to the end of your row, chain 2 for your turning chain since half double crochet is a bit taller than single crochet, and turn your work.
Now you can work half double crochets in the top of every stitch from the previous row. If you’re having trouble identifying the first stitch to work into, it’s marked in the image below:
Tips/common issues
Some issues you may come across while trying to make this stitch are:
Trouble inserting your hook into the stitch after yarning over- Keeping that yarn over on your hook can make it more difficult to insert your hook into the stitch. If you look at the gif, you can see that I use the index finger of my right hand to hold that loop as I put my hook into the chain.
Having trouble pulling the final loop through 3 loops- Issues with this are likely similar to that of single crochet. Try and make sure your tension isn’t too tight, especially on the first yarn over before inserting your hook into a stitch.
I really suggest finding a way to grab both your work and your yarn at the same time with your left hand. If you’re not already doing that and you’re running into issues with this stitch, that’s a good way to make the stitch just a little easier. Keeping tension on your work and your yarn at the same time can help you pull that final loop through.
In this post, we’ll cover how to do the half double crochet stitch. If you’re left-handed, check that tutorial out here, or if you prefer a video tutorial check that out here.
Before we get started, make sure you have a chain of about 15 or so, which you can learn how to do here.
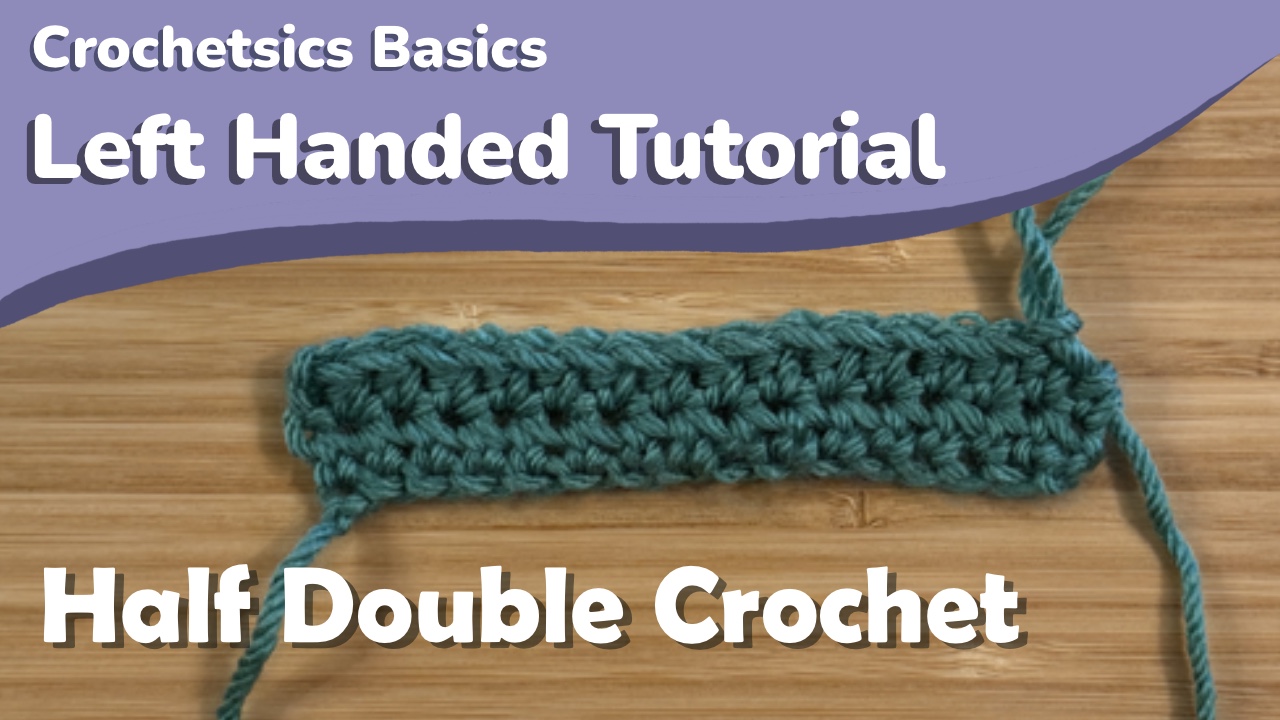
Here’s what the half double crochet looks like:
Stitch instructions
The shorthand for half double crochets in a written pattern is hdc.
The chart symbol for half double crochets is
I’m going to be working into a chain for my example.
Start by identifying the third chain from your hook which is indicated in the image below. This is one chain further than single crochet, and where we’re going to work into for this stitch.
Half double crochet starts with a yarn over before inserting your hook into the starting chain.
Once you’ve yarned over, you’re going to want to insert your hook into that third chain from your hook we identified earlier. You can put a finger from your hook hand on that yarn over to make it a little easier to insert your hook.
We’ll then yarn over and pull that loop through the chain
You now have three loops on your hook.
Yarn over one more time, and pull that through all three loops on your hook.
That’s the half double crochet!
Continue working one half double crochet in every chain.
Continuing in rows
Continuing rows in half double crochet works very similarly to single crochet. Once you get to the end of your row, chain 2 for your turning chain since half double crochet is a bit taller than single crochet, and turn your work.
Now you can work half double crochets in the top of every stitch from the previous row. If you’re having trouble identifying the first stitch to work into, it’s marked in the image below:
Tips/common issues
Some issues you may come across while trying to make this stitch are:
Trouble inserting your hook into the stitch after yarning over- Keeping that yarn over on your hook can make it more difficult to insert your hook into the stitch. If you look at the gif, you can see that I use the index finger of my right hand to hold that loop as I put my hook into the chain.
Having trouble pulling the final loop through 3 loops- Issues with this are likely similar to that of single crochet. Try and make sure your tension isn’t too tight, especially on the first yarn over before inserting your hook into a stitch.
I really suggest finding a way to grab both your work and your yarn at the same time with your left hand. If you’re not already doing that and you’re running into issues with this stitch, that’s a good way to make the stitch just a little easier. Keeping tension on your work and your yarn at the same time can help you pull that final loop through.
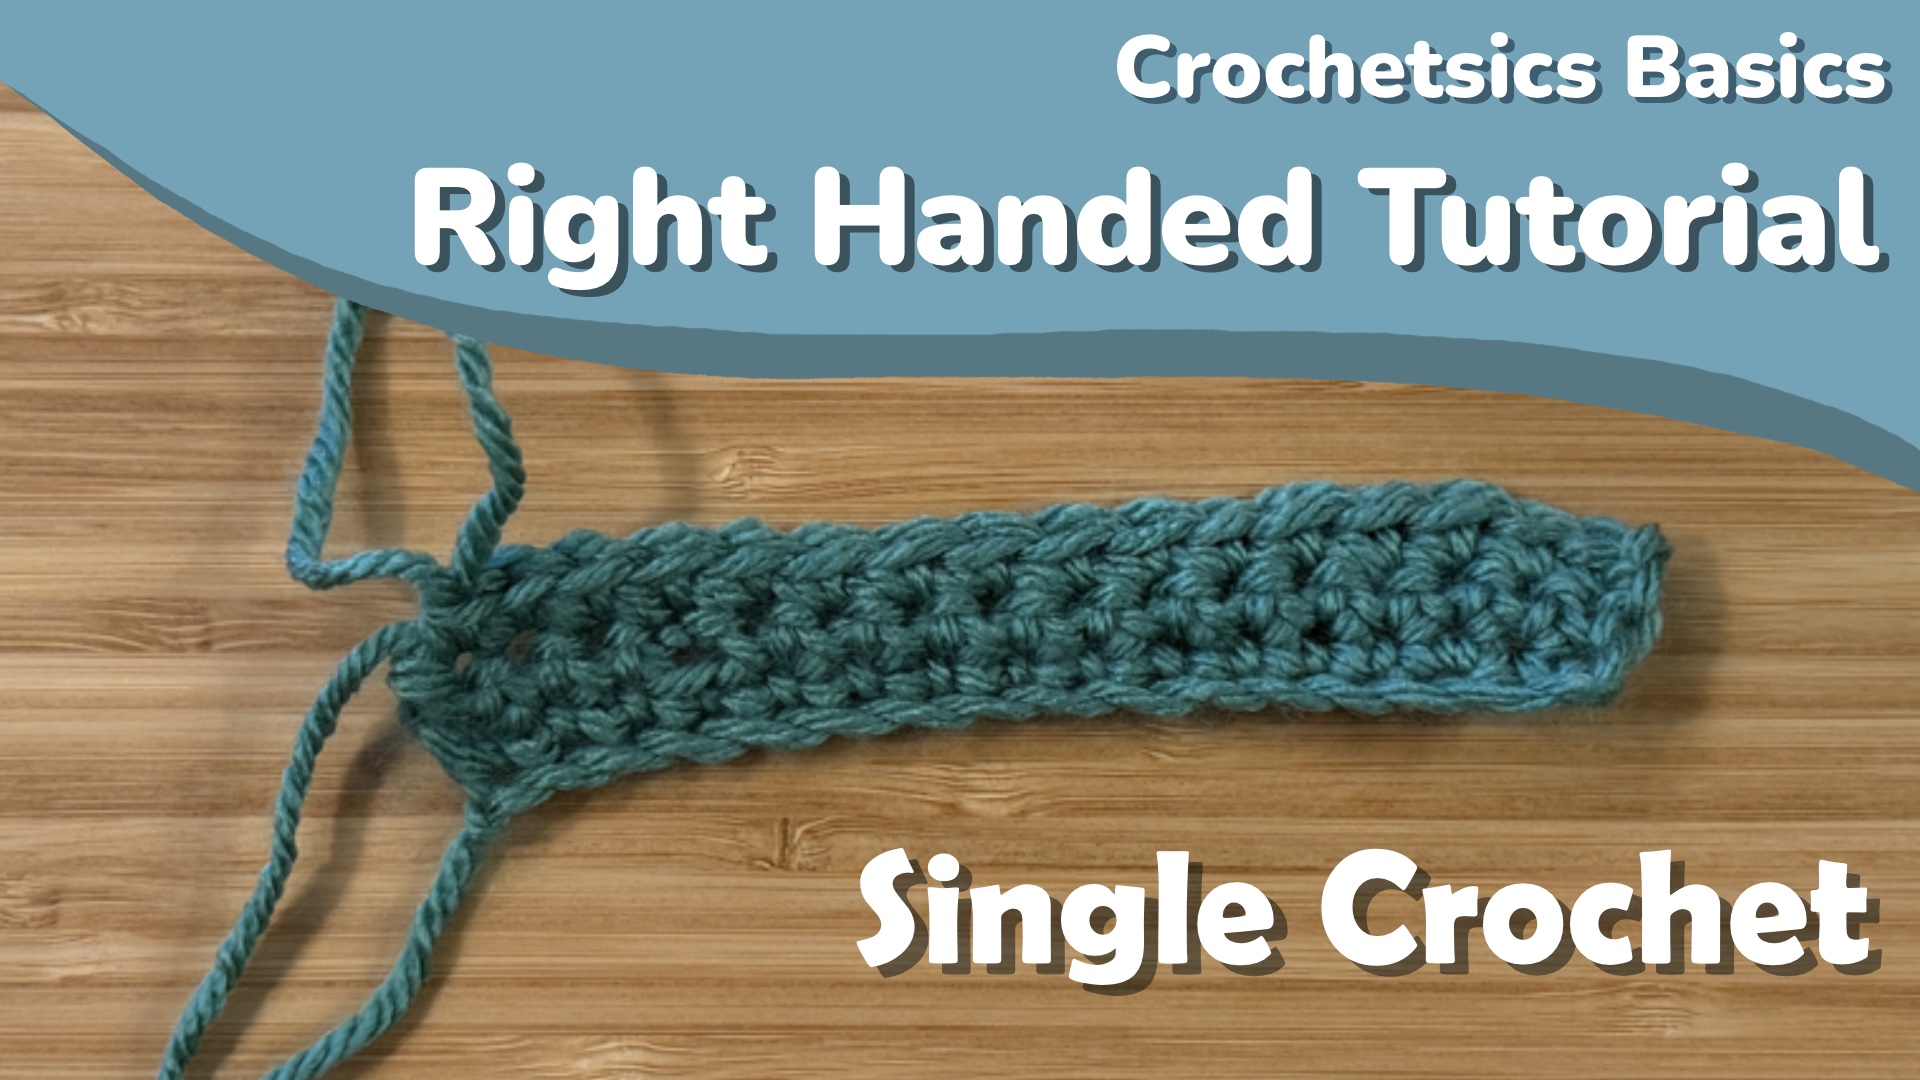
In this post, we’ll cover the most basic crochet stitch- the single crochet. If you’re right-handed, check that tutorial out here, or if you prefer a video tutorial check that out here.
Alright, now before we get started, make sure you have a chain of about 15 or so, which you can learn how to do here.
Here’s what the single crochet looks like:
Stitch instructions
The shorthand for single crochets in a written pattern is sc.
The chart symbol for single crochets is
In order to work your single crochet into a chain, you’re going to want to insert your hook into the second chain from your hook which is indicated in the image below.
There’s a few ways to work into this chain, but we’ll keep it simple and just work into the top loop, so insert your hook under that top loop.
Much like the chain, we’re now going to yarn over, which is just putting the yarn over the hook.
We’re going to grab that yarn and pull it under just that loop we inserted our hook into. In other words, you should have 2 loops on your hook, and we want to pull this yarn through just one of them.
You’ll now have two loops on your hook. Now, yarn over again, and pull that loop through both loops on your hook. Much like with the chains, when you pull this loop through, face the mouth of your hook downward towards the v’s of the loops on your hook.
You’ve now completed a single crochet!
Continue working one single crochet in every chain until you get to the end. If you’re just starting out, it might be a bit difficult to figure out where you’ve worked before and where you still need to work, so the next chain is marked on the image below if you need some help:
Continuing in rows
You’ll notice that the top of the single crochet stitch has these v’s on it, much like how the chain looked. When you’ve worked into every chain and you’re back at your slip knot, you’re going to chain one, then turn your work around. This chain one is also called a turning chain, and it essentially allows us to get back up to stitch height for our next row of stitches.
Now that you’ve turned your work, you can keep doing single crochets in the tops of the single crochets from the previous rows. You’re again going to start in the second stitch from your hook:
But this time you’re going to go under both loops of the top of your single crochet:
You’ll then do your single crochet into this space.
Tips/common issues
Some issues you may come across while trying to make this stitch are:
Inability to work into the chain/previous stitches- This indicates that your tension while working those stitches was too tight. There’s not a lot you can do about that other than rip those stitches out (a.k.a. “frog” them) and redo them with looser tension.
Catching your hook on the loops/yarn- You may be holding your tension too tight as you try to work the stitch, or you could be orienting your hook in such a way that it catches the yarn. This is why I try to emphasize putting the mouth of your hook down towards the v of the loop: I find that it’s harder to catch your hook on something if the mouth faces the v.
Rows of single crochets are narrowing/not straight edges- Beginner crocheters often miss the last stitch in a row. There’s a couple fixes for this. One is to count your stitches and make sure you have the same number every row. The other is to use your stitch marker to mark the first stitch in your row. So when you finish that first single crochet, put a stitch marker in it like this:
When you get back to it, remove the stitch marker, and do a single crochet where that stitch marker was.
Now that you know how to single crochet, get some practice with them and do a few rows. Next up is half double crochet!
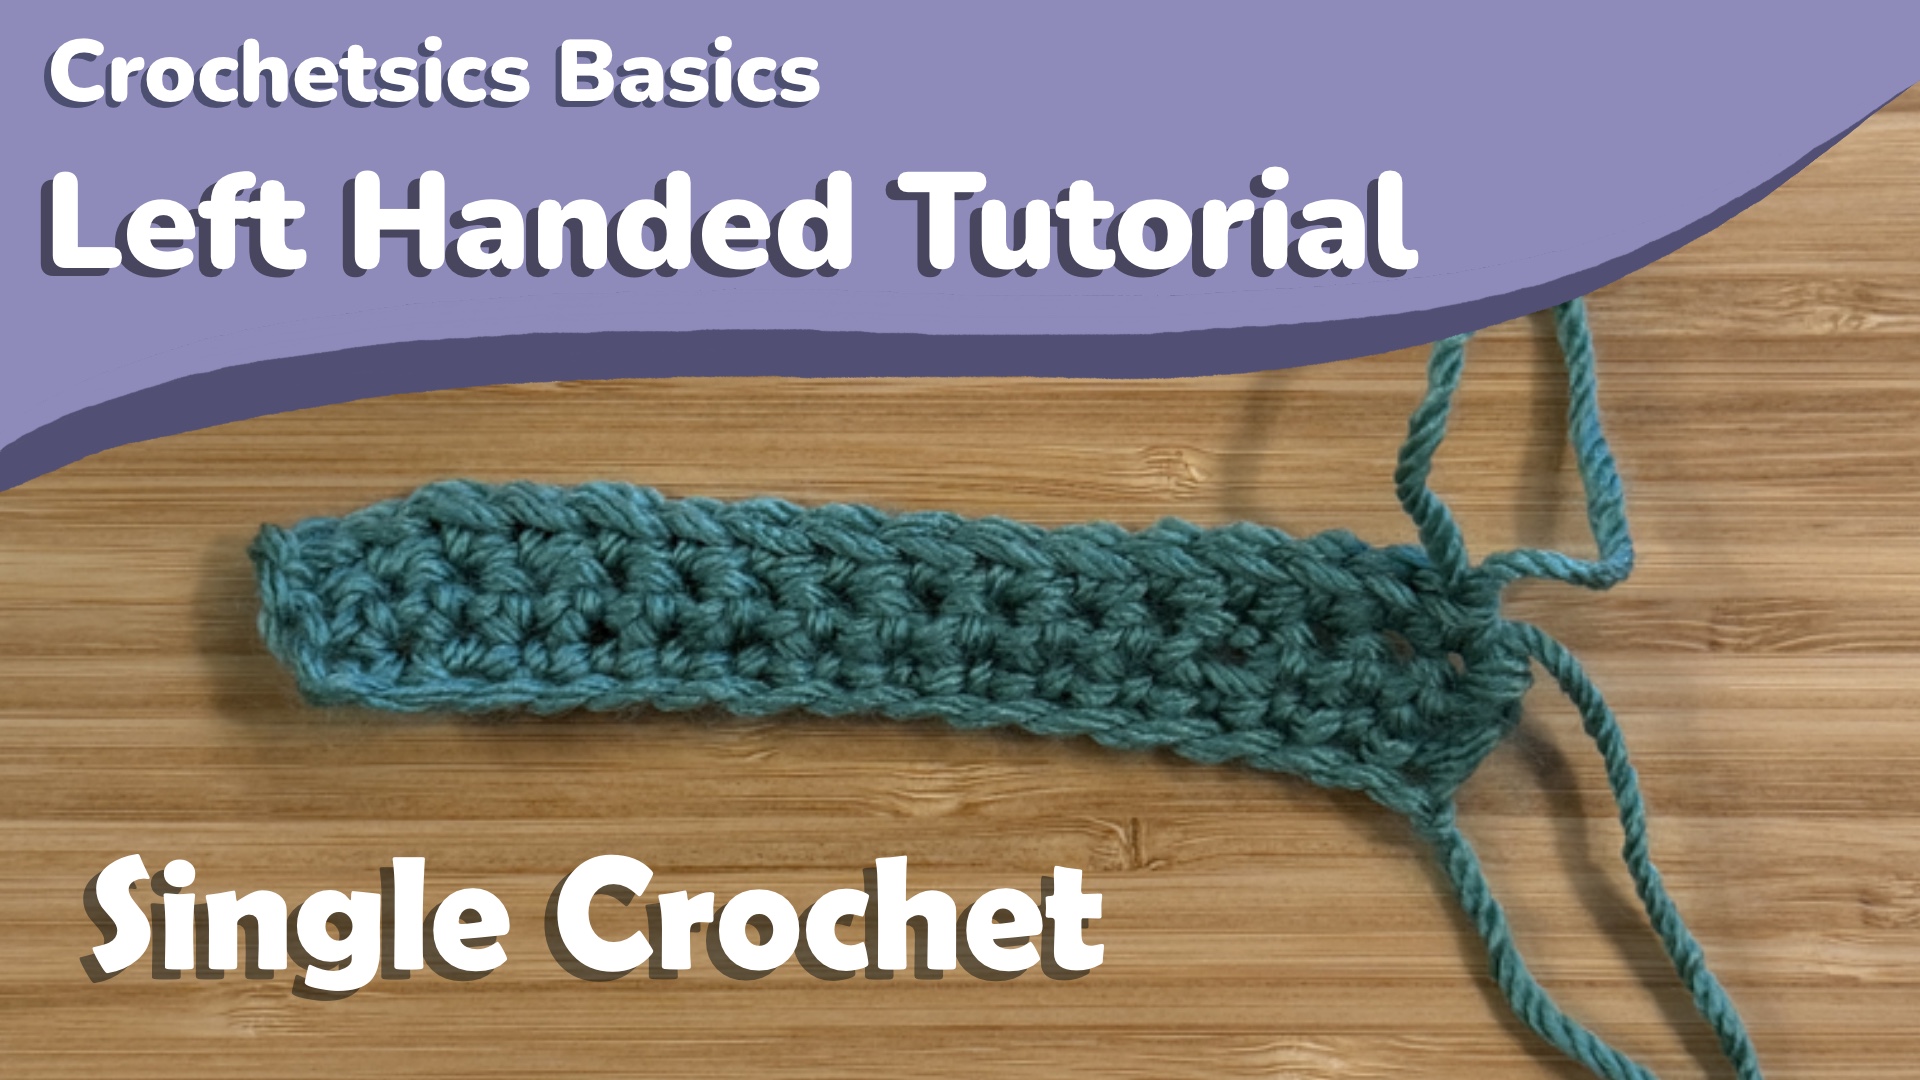
In this post, we’ll cover the most basic crochet stitch- the single crochet. If you’re left-handed, check that tutorial out here, or if you prefer a video tutorial check that out here.
Alright, now before we get started, make sure you have a chain of about 15 or so, which you can learn how to do here.
Here’s what the single crochet looks like:
Stitch instructions
The shorthand for single crochets in a written pattern is sc.
The chart symbol for single crochets is
In order to work your single crochet into a chain, you’re going to want to insert your hook into the second chain from your hook which is indicated in the image below.
There’s a few ways to work into this chain, but we’ll keep it simple and just work into the top loop, so insert your hook under that top loop.
Much like the chain, we’re now going to yarn over, which is just putting the yarn over the hook.
We’re going to grab that yarn and pull it under just that loop we inserted our hook into. In other words, you should have 2 loops on your hook, and we want to pull this yarn through just one of them.
You’ll now have two loops on your hook. Now, yarn over again, and pull that loop through both loops on your hook. Much like with the chains, when you pull this loop through, face the mouth of your hook downward towards the v’s of the loops on your hook.
You’ve now completed a single crochet!
Continue working one single crochet in every chain until you get to the end. If you’re just starting out, it might be a bit difficult to figure out where you’ve worked before and where you still need to work, so the next chain is marked on the image below if you need some help:
Continuing in rows
You’ll notice that the top of the single crochet stitch has these v’s on it, much like how the chain looked. When you’ve worked into every chain and you’re back at your slip knot, you’re going to chain one, then turn your work around. This chain one is also called a turning chain, and it essentially allows us to get back up to stitch height for our next row of stitches.
Now that you’ve turned your work, you can keep doing single crochets in the tops of the single crochets from the previous rows. You’re again going to start in the second stitch from your hook:
But this time you’re going to go under both loops of the top of your single crochet:
You’ll then do your single crochet into this space.
Tips/common issues
Some issues you may come across while trying to make this stitch are:
Inability to work into the chain/previous stitches- This indicates that your tension while working those stitches was too tight. There’s not a lot you can do about that other than rip those stitches out (a.k.a. “frog” them) and redo them with looser tension.
Catching your hook on the loops/yarn- You may be holding your tension too tight as you try to work the stitch, or you could be orienting your hook in such a way that it catches the yarn. This is why I try to emphasize putting the mouth of your hook down towards the v of the loop: I find that it’s harder to catch your hook on something if the mouth faces the v.
Rows of single crochets are narrowing/not straight edges- Beginner crocheters often miss the last stitch in a row. There’s a couple fixes for this. One is to count your stitches and make sure you have the same number every row. The other is to use your stitch marker to mark the first stitch in your row. So when you finish that first single crochet, put a stitch marker in it like this:
When you get back to it, remove the stitch marker, and do a single crochet where that stitch marker was.
Now that you know how to single crochet, get some practice with them and do a few rows. Next up is half double crochet!
In this post, we’ll cover how to hold your yarn, as well as how to make the base for a lot of crochet projects: the chain stitch. If you prefer a video tutorial, check that out here and if you’re right handed, check out that tutorial here.
First things first, you’ll need to make a slip knot and put the loop on your hook.
Making a slip knot
Hold your yarn tail in your right hand, and your working end, which is the end connected to your yarn ball, in your left hand.
Now, twist your working yarn over the top of your tail. The ends of the yarn tail and working yarn should still be in the same places, with your tail lying to your right and your working yarn to your left.
Now, grab the end of your working yarn through the loop you’ve created. While holding that loop, close the slip knot by pulling on the yarn tail.
You should now have a slip knot! If you pull on the working yarn you should begin to shrink the loop of your slip knot. Pull on the working yarn to close the loop around your hook.
Holding your yarn and hook
Everyone holds their yarn differently. Personally, I’d suggest having two points of contact with your yarn on your non-dominant hand. Here’s what that means for me:
You can see that it loops around my fingers. There’s one point of contact between my pinkie and ring finger, and once over my index finger. I feel like this allows me to control the amount of yarn coming through on that first point of contact, and control the tension of the individual stitch on the second. Search around and see how other people hold their yarn too, because you might hate this.
In terms of holding your hook, there’s knife and pencil grip
Knife Grip
Pencil Grip
I think most people tend to use knife grip, but again it’s up to you and what you feel comfortable with.
Stitch instructions
The shorthand for chains in a written pattern is ch.
The chart symbol for chains is
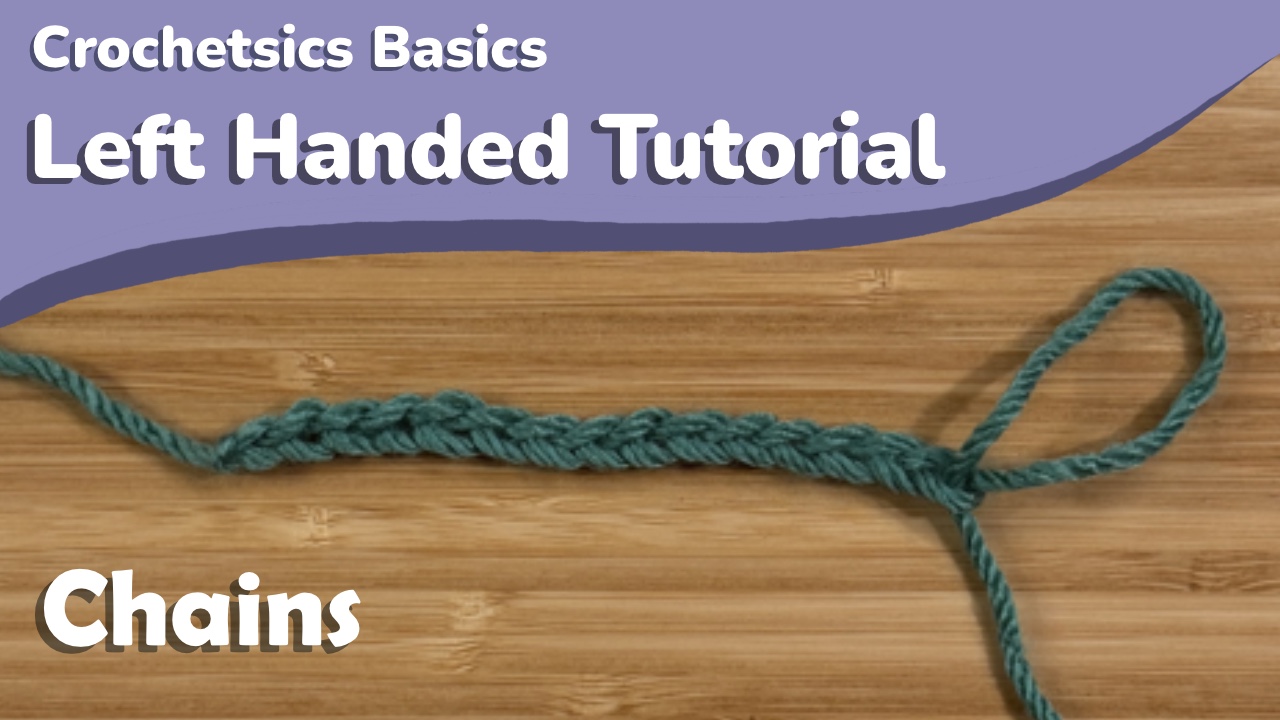
Here’s what a chain looks like:
Hold your working yarn and yarn tail in your right hand. This allows you to keep tension on your work as well, which helps you pull loops through the ones on your hook. Hold your yarn behind your hook.
Our first step is to yarn over, putting the yarn over your hook. Then, grab the yarn with your hook. You’re going to be twisting the mouth of the hook down and away from you a little bit here.
Now, you’re going to start using your hook to pull the yarn through the loop on your hook. Don’t hold your yarn or work too tight here! Try and keep it loose. Also, try and angle the mouth or opening of your hook to be at the knot of your slip knot as you pull it through.
You’ve just completed your first chain stitch!
In chains after your first, you want the mouth of your hook to face the v of the loop currently on your hook when you pull the loop through:
Final appearance
When you do a bunch of these, they start to make this almost braided or chain like texture. You can see a bunch of nested v shapes in the longer chain.
Tips/common issues
Here’s some common issues you may come across:
Holding your yarn too tight- If you can’t pull your hook through the loop on your hook, you’re probably holding your yarn too tight. Try and hold the yarn just tight enough you don’t lose your grip on it.
Losing hold of your yarn- This one does take a bit of practice. It may be that you’re holding your yarn a little too lose. Again, try and hold the yarn just tight enough that you don’t lose your grip on it. How tight or loose you hold your yarn is called your tension and it can be pretty tricky to get right, so just keep practicing.
Catching the hook on the loop when pulling through– When trying to pull your new loop through the one already on your hook, you might be catching the existing loop and struggling to pull the new loop through. Try to make sure the mouth (or opening) of your hook is facing that v of the chain stitch- this means the mouth of your hook isn’t facing a strand of yarn when pulling through.
Pulling the loop tight- Once you finish your chain stitch, don’t pull the chain tight! We want these chain stitches to be open and loose- you’re going to be working into them later and so you’ll need space for your hook to enter.
My advice for now is to just go ahead and make a long chain and try to get comfortable with the process. We’ll start with single crochets in the next post!
In this post, we’ll cover how to hold your yarn, as well as how to make the base for a lot of crochet projects: the chain stitch. If you prefer a video tutorial, check that out here and if you’re left handed, check out that tutorial here.
First things first, you’ll need to make a slip knot and put the loop on your hook.
Making a slip knot
Hold your yarn tail in your left hand, and your working end, which is the end connected to your yarn ball, in your right hand.
Now, twist your working yarn over the top of your tail. The ends of the yarn tail and working yarn should still be in the same places, with your tail lying to your left and your working yarn to your right.
Now, grab the end of your working yarn through the loop you’ve created. While holding that loop, close the slip knot by pulling on the yarn tail.
You should now have a slip knot! If you pull on the working yarn you should begin to shrink the loop of your slip knot. Pull on the working yarn to close the loop around your hook.
Holding your yarn and hook
Everyone holds their yarn differently. Personally, I’d suggest having two points of contact with your yarn on your non-dominant hand. Here’s what that means for me:
You can see that it loops around my fingers. There’s one point of contact between my pinkie and ring finger, and once over my index finger. I feel like this allows me to control the amount of yarn coming through on that first point of contact, and control the tension of the individual stitch on the second. Search around and see how other people hold their yarn too, because you might hate this.
In terms of holding your hook, there’s knife and pencil grip
Knife Grip
Pencil Grip
I think most people tend to use knife grip, but again it’s up to you and what you feel comfortable with.
Stitch instructions
The shorthand for chains in a written pattern is ch.
The chart symbol for chains is
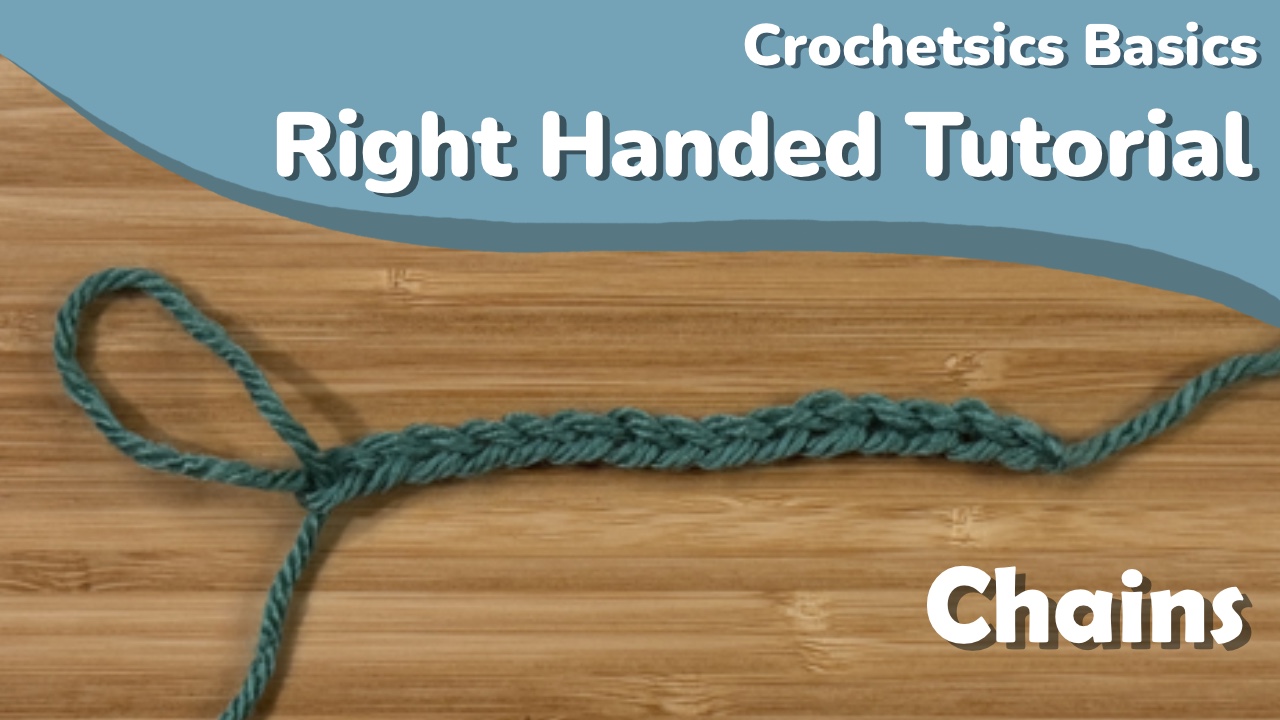
Here’s what a chain looks like:
Hold your working yarn and yarn tail in your left hand. This allows you to keep tension on your work as well, which helps you pull loops through the ones on your hook. Hold your yarn behind your hook.
Our first step is to yarn over, putting the yarn over your hook. Then, grab the yarn with your hook. You’re going to be twisting the mouth of the hook down and away from you a little bit here.
Now, you’re going to start using your hook to pull the yarn through the loop on your hook. Don’t hold your yarn or work too tight here! Try and keep it loose. Also, try and angle the mouth or opening of your hook to be at the knot of your slip knot as you pull it through.
You’ve just completed your first chain stitch!
In chains after your first, you want the mouth of your hook to face the v of the loop currently on your hook when you pull the loop through:
Final appearance
When you do a bunch of these, they start to make this almost braided or chain like texture. You can see a bunch of nested v shapes in the longer chain.
Tips/common issues
Here’s some common issues you may come across:
Holding your yarn too tight- If you can’t pull your hook through the loop on your hook, you’re probably holding your yarn too tight. Try and hold the yarn just tight enough you don’t lose your grip on it.
Losing hold of your yarn- This one does take a bit of practice. It may be that you’re holding your yarn a little too lose. Again, try and hold the yarn just tight enough that you don’t lose your grip on it. How tight or loose you hold your yarn is called your tension and it can be pretty tricky to get right, so just keep practicing.
Catching the hook on the loop when pulling through– When trying to pull your new loop through the one already on your hook, you might be catching the existing loop and struggling to pull the new loop through. Try to make sure the mouth (or opening) of your hook is facing that v of the chain stitch- this means the mouth of your hook isn’t facing a strand of yarn when pulling through.
Pulling the loop tight- Once you finish your chain stitch, don’t pull the chain tight! We want these chain stitches to be open and loose- you’re going to be working into them later and so you’ll need space for your hook to enter.
My advice for now is to just go ahead and make a long chain and try to get comfortable with the process. We’ll start with single crochets in the next post!
Welcome to Crochetsics Basics! This is my tutorial series for people who are absolute beginners at crochet (and fiber arts in general) and want to learn from scratch. This course should teach you everything you need to follow a beginner pattern and hit the ground running, as well as a few other techniques and stitches you may come across.
Course structure
I’ve split this course into two “halves”: in the first half we’ll be learning the basic crochet stitches and how to work in rows. In the second, we’ll learn some more advanced stitch techniques and how to work in rounds. Each half will be capped off with a cinch sack project that uses all the techniques we’ve covered so far.
The course also has right and left handed versions. Most people hold their hook in their dominant hand, and their yarn in their non-dominant hand, so that’s how I’ve named each version of the course. Feel free to follow whichever version feels more comfortable for you! I’m right handed, and so the left-handed version just features me mirroring anything I did for the right-handed version. If there are any mistakes in my descriptions, let me know and I’ll fix them!
There’s also a corresponding video tutorial series, so if you’d rather follow video tutorials, those will be linked at the start of each post. Here’s the video for this post!
First, let’s get into the things you’ll need to follow along with this course.
Hook
The hook I’d suggest for this course is a 5.5 mm inline aluminum hook.
This may also be labeled as a US I or I9 hook.
You don’t need to worry too much about why I suggest this type of hook in particular, but if you’re curious, keep reading. If not, go ahead and skip down to the yarn section.
Shape
You’re going to see two different hook shapes: tapered and inline.
I’d suggest an inline hook if you’re just starting out. These are the ones that look like a cylinder with a notch carved into them. You’re probably less likely to drop your yarn with these, and the sharp point can make it easier to get the hook into a stitch.
Tapered hooks are great once you’re more comfortable with crochet. They don’t have any sharp edges, making it much easier to slip through loops on your hook. You can crochet quicker with these, but they may also result in tighter stitches. It’s also a bit easier to drop loops since there’s nothing “grabby” on the hook.
Material
Aluminum is I feel the slipperiest material you can get, which can make it easier to slide your hook through the yarn. I’ve found wooden hooks to be super grippy, so I’ve had to hold my yarn pretty loose to use them.
Handle
Some crochet hooks also have ergonomic grips. These are great to give yourself a little bit larger handle to hold on to, but they aren’t critical for the size hook we’ll be dealing with so no worries if you can’t find one.
Yarn
For this course, try to get a 4, or worsted, weight yarn.
In America, this is shown in the little yarn emblem above. These are also known as medium or worsted weight yarns. The yarn label also has information on the amount of yarn in the skein and the fiber content. They often also have suggested hook or needle sizes.
The material you choose for this isn’t super critical for this course, so it’s really dependent on what you like. The fiber type and makeup will also be listed somewhere on the label
Here’s some common yarn fibers to start out with:
Acrylic- Usually one of the cheaper options, and fairly stretchy. Some people don’t like this for sensory reasons, since it can be kinda scratchy.
Cotton- Stiffer than acrylic and much less stretch. This can make it a bit tougher on your hands, but may be more comfortable to use from a sensory standpoint.
Wool- Most common in specialty or independent yarn stores, but also available in big craft stores. These can also be fairly scratchy depending on the yarn you get. Merino wool is typically a bit softer.
When you select your yarn, feel them to see whether or not you like them. It’ll probably take some time to figure out what you like. Unlike for the hook, I’d suggest a yarn that ISN’T super slippery. These can be harder to hold on to with your hook, so try to avoid slick feeling yarns like bamboo or certain acrylics.
If you’re getting your yarn secondhand, it might not be labeled. In that case, you can determine the yarn size using the wraps per inch (wpi) of the yarn- the number of wraps it takes for the yarn to span an inch. Worsted weight yarn is about 9 wpi.
Notions
These are the non-hook-or-yarn things you should have on hand:
Tapestry needle- These are needles specifically for yarn, so they’re bigger than sewing or embroidery needles. I personally really like the ones with bent ends, but the straight ones are fine too. I’d advise against plastic needles since they’re more susceptible to bending or breaking.
Stitch marker- These are always useful and are used to mark stitches (who would have guessed?) You need to get ones that open and close. The fully enclosed ones are for knitting and don’t work for crochet.
Scissors- For cutting your yarn!
Conclusion
Alright! Time for a summary of what you’ll need for this course:
5.5 mm aluminum inline hook
4/worsted weight yarn
Tapestry needle
Stitch marker
Scissors
We’ll be starting to learn to crochet in the next post, so get your hands on these, and I’ll meet you there!
Used to monitor number of Google Analytics server requests when using Google Tag Manager
1 minute
_gid
ID used to identify users for 24 hours after last activity
24 hours
_gac_
Contains information related to marketing campaigns of the user. These are shared with Google AdWords / Google Ads when the Google Ads and Google Analytics accounts are linked together.
90 days
_gali
Used by Google Analytics to determine which links on a page are being clicked
30 seconds
_ga
ID used to identify users
2 years
__utmx
Used to determine whether a user is included in an A / B or Multivariate test.
18 months
__utmv
Contains custom information set by the web developer via the _setCustomVar method in Google Analytics. This cookie is updated every time new data is sent to the Google Analytics server.
2 years after last activity
__utmz
Contains information about the traffic source or campaign that directed user to the website. The cookie is set when the GA.js javascript is loaded and updated when data is sent to the Google Anaytics server
6 months after last activity
__utmc
Used only with old Urchin versions of Google Analytics and not with GA.js. Was used to distinguish between new sessions and visits at the end of a session.
End of session (browser)
__utmb
Used to distinguish new sessions and visits. This cookie is set when the GA.js javascript library is loaded and there is no existing __utmb cookie. The cookie is updated every time data is sent to the Google Analytics server.
30 minutes after last activity
__utmt
Used to monitor number of Google Analytics server requests
10 minutes
__utma
ID used to identify users and sessions
2 years after last activity
SourceBuster is used by WooCommerce for order attribution based on user source.
Name
Description
Duration
sbjs_migrations
Technical data to help with migrations between different versions of the tracking feature
session
sbjs_current_add
Timestamp, referring URL, and entry page for your visitor’s current visit to your store
session
sbjs_first_add
Timestamp, referring URL, and entry page for your visitor’s first visit to your store (only applicable if the visitor returns before the session expires)
session
sbjs_current
Traffic origin information for the visitor’s current visit to your store
session
sbjs_first
Traffic origin information for the visitor’s first visit to your store (only applicable if the visitor returns before the session expires)
session
sbjs_udata
Information about the visitor’s user agent, such as IP, the browser, and the device type
session
sbjs_session
The number of page views in this session and the current page path